How to Build a PC in 2026: Step by Step, With the Problems Nobody Warns You About

Installing an AMD Ryzen CPU into the motherboard socket while building a PC

Building a PC sounds like a job for experts. It is not. Modern parts only fit one way, every connector is shaped so it cannot go into the wrong slot, and the whole job needs exactly one tool: a cross-head screwdriver. If you can put flat-pack furniture together, you can build a computer.

We build and repair PCs every week, and this guide is written the way we explain it across the counter: every step in order, in plain language, with the real problems beginners hit and how to get past them. That last part matters. Most guides stop at “press the power button”, and that is exactly where the panic usually starts. So this one keeps going: the black screen that looks like a disaster but is completely normal, the checklist for when nothing appears on the monitor, and the small mistakes we fix on our bench every single week.

Gaming PC, work machine or your first ever computer, the steps are the same. Take your time and enjoy it. Most people finish their first build in an afternoon and stay proud of it for years.

A first PC build takes three to five hours, needs one screwdriver, and is closer to Lego than to electronics. Parts only fit where they belong. The two moments that scare beginners most, pressing the RAM down until it clicks and the long black screen on the very first start, are both normal. And the most common “broken” new PC we see is simply a monitor plugged into the wrong port.

How hard is it to build a PC, and how long does it take?

Honest answer: much easier than it looks. There is no soldering and no wiring knowledge needed. A PC is seven or eight parts that plug into each other, and each plug is shaped so it only fits its own socket. The two skills that actually matter are reading the manual and being patient.

How long does it take to build a PC? Plan a free afternoon. Here is how the time really breaks down for a first build:

StageTime (first build)
Choosing the partsThe longest stage by far. A few evenings if you enjoy it
Unpacking and laying everything out30 minutes
The build itself2 to 4 hours
Installing Windows and driversAbout 1 hour
Someone who builds every weekUnder an hour for the whole thing

Do not race the clock. Almost every mistake we see comes from rushing: a cable half plugged in, a screw forced at an angle, a step skipped because it looked boring. Slow is smooth, and smooth gets you a working PC on the first try.

How much does it cost to build a PC in 2026?

It depends on what you want the machine to do. These are realistic UK totals for the parts, based on what our customers actually spend:

BuildParts costWhat you get
Basic home and office PC£400 to £600Fast everyday computer for work, browsing and studies
Budget 1080p gaming PC£600 to £800Esports and most games at high settings
The 1440p sweet spot£900 to £1,400Modern games at high settings. The best value per pound in 2026
High-end 4K build£1,600 to £2,500Maxed settings, heavy video editing, serious creative work

Three honest notes on cost. First, prices move every week, so treat these as ranges, not promises. Second, building is usually cheaper than buying a ready-made PC with the same parts, and you get to choose the quality of every single component, especially the power supply, where prebuilt machines love to cut corners. Third, the graphics card will be a third to half of a gaming budget, so decide on that first.

If you want help deciding how much to spend and where, we wrote a full guide on exactly that: how much to spend on a gaming PC in 2026.

What you need before you start

Every PC is built from the same core parts. Quick tour, in plain words:

  • Processor (CPU): the brain. Does the thinking.
  • Motherboard: the big board everything plugs into.
  • RAM: the short-term memory. Two sticks is the normal setup.
  • SSD: the storage. Today that means a small M.2 stick, not a big box.
  • Graphics card (GPU): draws the picture. The big one for gaming.
  • Power supply (PSU): feeds everything. Never worth cheaping out on.
  • Case and cooler: the home and the air conditioning.

The parts have to match each other: the CPU must fit the motherboard’s socket, the RAM must be the right generation, the case must fit the graphics card. Our guide to choosing PC components walks through all of it, and a free site called PCPartPicker flags most mismatches automatically.

Tools: one cross-head screwdriver. That is genuinely the list. Add good light, a small bowl for screws, and the motherboard manual within reach. You will also want a USB stick (8GB or more) with the Windows installer on it. Make it on your old computer before you take it apart. Microsoft’s free Media Creation Tool does it in ten minutes.

Do you need to worry about static electricity? A little, not a lot. Static can damage parts, but it is rarer than the internet suggests. Follow three simple habits and you are fine: work on a table, not on a carpet. Touch something metal (the case frame or the power supply) every few minutes to discharge yourself. And keep parts in their grey anti-static bags until you need them. If you want total peace of mind, an anti-static wrist strap costs about £5.

Fitting a case screw with a screwdriver while building a PC
One screwdriver really is the whole toolkit for a PC build.

The build, step by step

This is the order we use on the bench. It is designed so that each part is easy to reach when you fit it, and so that problems show up early, while they are still easy to find.

Set up your table

Clear a table, get good light, and put the motherboard box in front of you. You will build the heart of the PC on top of that box first, outside the case. It is easier to work on, and if something needs to come back out, you will not be fishing around inside a metal tower. Keep the manual open. Nobody memorises where the tiny connectors go, not even us.

Install the CPU

Open the metal arm on the motherboard’s CPU socket. Look at the corner of your CPU: there is a small golden triangle. Match it to the triangle marked on the socket, and lower the chip straight down. Do not push. It should sit flat under its own weight. If it does not, lift it and check the triangle again. Close the arm; it needs firm pressure and can make a creaking sound, which is normal. Never touch the pins or pads underneath the chip.
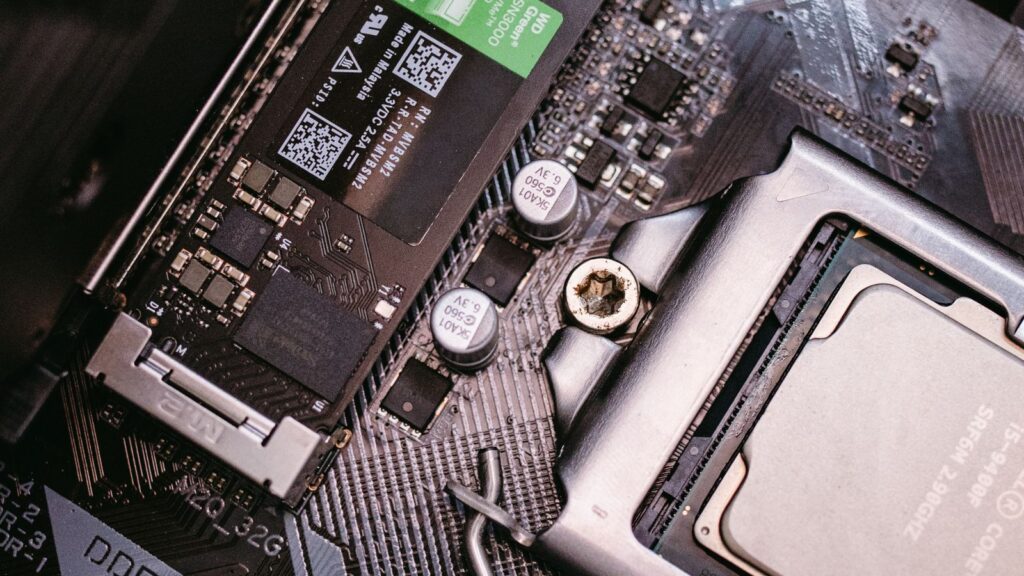
Fit the M.2 SSD

Your SSD is a stick the size of a chewing gum packet. Find the M.2 slot on the motherboard (the manual shows which slot is the fast one), slide the SSD in at an angle, press it flat, and fix it with the tiny screw or plastic latch. Done. If Windows cannot see the drive later, that is a settings issue, not a hardware one; our SSD not detected guide covers it.
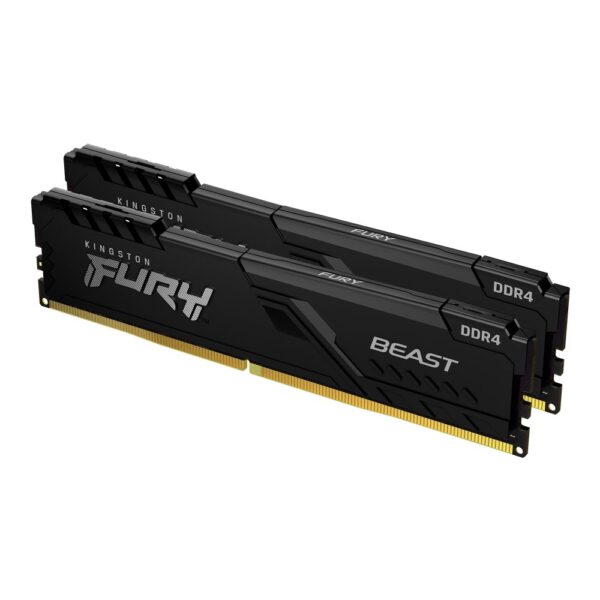
Install the RAM

Here is the first moment that scares people. Check the manual for which two slots to use with two sticks; on almost every board it is slots 2 and 4 counting from the CPU, usually named A2 and B2. Open the clips, line up the notch in the stick with the bump in the slot, and press down on both ends until each end clicks. It takes more force than feels polite, and the click is loud. RAM that is only half in is the number one cause of a PC that will not start, so make sure both clips have closed.

Mount the cooler

Two things before anything else: if there is a plastic film on the cooler’s metal base, peel it off. Forgetting it is a classic, and the PC will overheat within minutes. And check whether the base already has grey thermal paste applied. If it does, fit it as it is. If it is bare metal, squeeze a blob of paste the size of a small pea onto the middle of the CPU; the pressure spreads it for you. More is not better. Screw the cooler down in a cross pattern, a little on each screw at a time, until snug. Then plug the fan cable into the header marked CPU_FAN. Miss that plug and many boards will refuse to start at all as a safety measure.

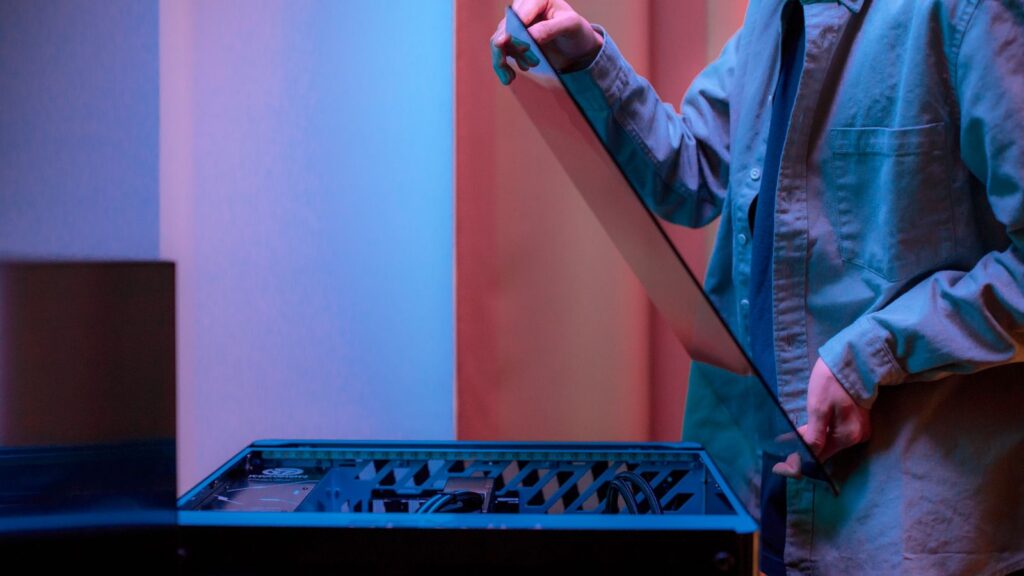
Lower the motherboard into the case

Take the side panels off the case and check the little brass pillars inside, called standoffs. They must match your motherboard’s screw holes, no extras. A spare standoff touching the back of the board can stop the whole PC from starting. Most modern boards have the metal port cover built in; if yours came with a separate rectangular plate, snap it into the case opening first, because it cannot be added later without taking everything back out. Lower the board in, line up the holes, and screw it down snug, not tight.

Fit the power supply and the two big cables

The power supply goes in its bay, usually at the bottom, fan facing the vent, four screws from the back. Now connect the two cables that matter most: the wide 24-pin cable to the right edge of the motherboard, and the 8-pin CPU cable to the top-left corner of the board. That top-left cable is the most forgotten cable in PC building, and without it nothing will turn on. One safety rule to remember for life: if the power supply is modular (cables detach), only ever use the cables that came in its own box. Cables from a different power supply can fit perfectly and still destroy your drives the moment you switch on.

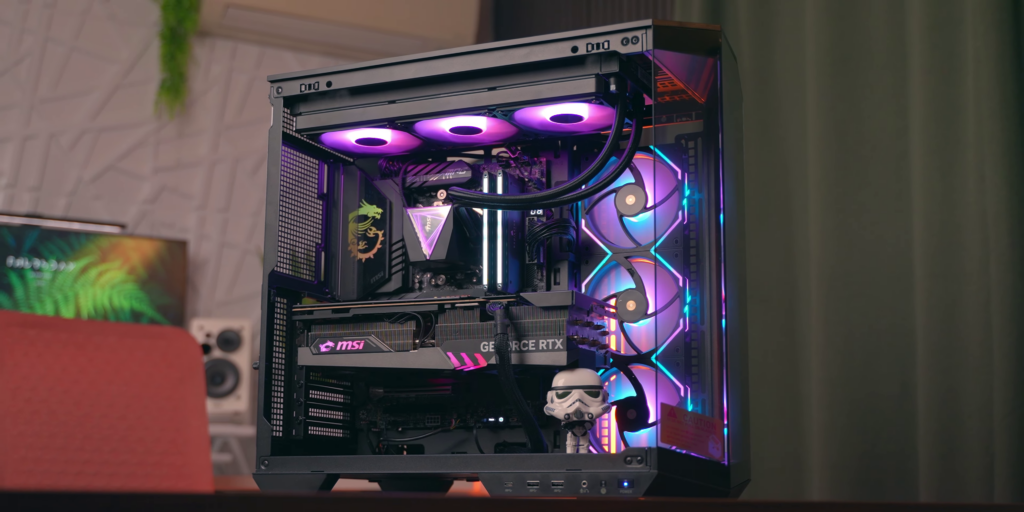
Install the graphics card

Remove the metal covers on the back of the case next to the top PCIe slot (the long slot closest to the CPU). Line the card up, press it in until the slot’s latch clicks, and screw its bracket to the case. Then plug in its power cables from the power supply, and push until the clip is fully seated. On new cards with the small 12-pin style connector this matters even more: a half-inserted plug can overheat. If the cable clicks and sits flush, you are safe.

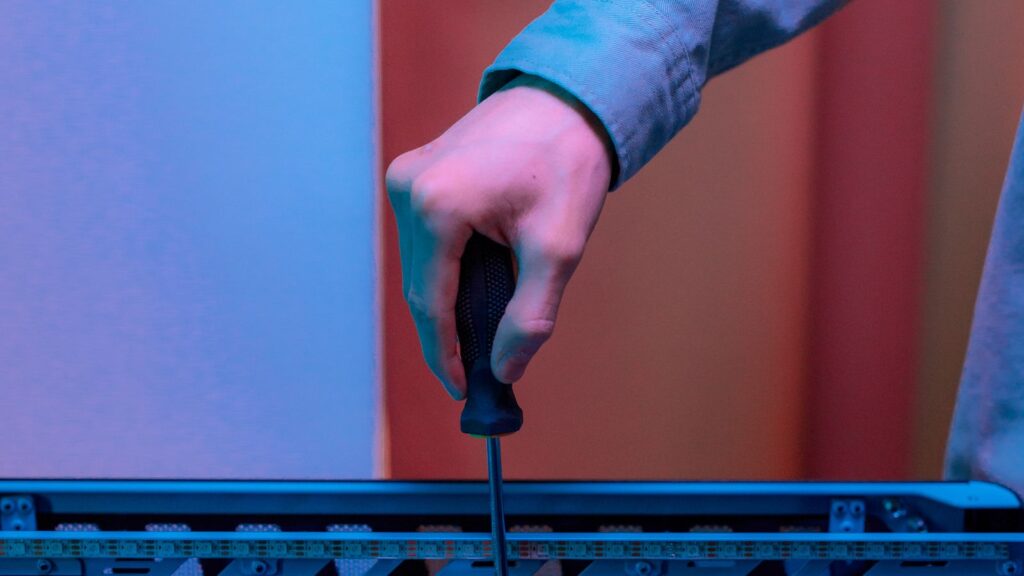
Connect the front of the case

The fiddliest five minutes of the build, and the manual is your friend. The case gives you a handful of small cables: the power button and LEDs (tiny pins, marked on the board, and if an LED ends up backwards it simply will not light; nothing breaks), the USB cables (the wide USB 3 plug goes in firmly but do not force it, its pins bend easily), and the front audio plug, marked HD AUDIO, which goes to the bottom-left corner of the board. Case fans plug into headers marked SYS_FAN or CHA_FAN.

Do the sixty-second pre-flight check

Before the glass goes on, check these six things. This little list prevents almost every “it will not turn on” moment:

  • 24-pin motherboard cable: fully in?
  • 8-pin CPU cable, top-left: fully in?
  • Graphics card power cables: clicked in?
  • RAM: both clips closed on both sticks?
  • CPU fan: plugged into CPU_FAN?
  • Monitor cable: into the graphics card, not the motherboard?

That last one deserves repeating, because it is the single most common “my new PC is broken” call we get. If you have a graphics card, the monitor plugs into it, low down on the back of the case. The ports up by the USB sockets belong to the motherboard and often show nothing at all.

First power on

Plug in the power lead, flip the switch on the back of the power supply to the line position ( | ), and press the power button. Fans should spin and lights should come on. What happens on the screen next deserves its own section, because this is where beginners panic for no reason: read first boot below before you touch anything.

Set up the software

Once you see the BIOS screen (the built-in settings screen), do two things. First, find the memory profile setting called XMP, EXPO or DOCP and turn it on; without it your RAM runs at a slower speed forever, and it is the most commonly skipped step in all of PC building. Second, put your Windows USB stick in, restart, and follow the installer. Afterwards, grab the latest graphics driver from NVIDIA, AMD or Intel, and the motherboard drivers from its maker’s support page. Then tidy your cables, fit the glass, and you are done.

Fitting the tempered glass side panel onto a freshly built gaming PC
The best moment of the build: the glass goes on and the cables disappear.

First boot: the part nobody warns you about

You press the button, the fans spin, and the screen stays black. Every first-time builder meets this moment, and it is where most of the panic on Reddit’s build communities comes from. Here is what is actually happening.

A long black screen on the very first start is normal. Modern DDR5 systems, especially AMD ones, spend their first boot doing something called memory training: the motherboard is testing and tuning your exact RAM sticks. Crucial, one of the biggest memory makers, says this can take up to 15 minutes, during which the screen shows nothing at all. It only happens on the first start and after certain settings changes. So before you touch anything: wait a full fifteen minutes. Do not press reset, do not flip the power switch. Interrupting the training restarts it.

Still black after a genuine fifteen minutes? Now work down this list in order:

What you seeMost likely causeThe fix
Fans spin, screen blackMonitor plugged into the motherboard instead of the graphics card, or RAM not fully clicked inMove the monitor cable to the graphics card. Then reseat both RAM sticks firmly
Nothing happens at allPower supply switch off, or the power button cable on the wrong pinsCheck the switch on the back ( | is on), the wall socket, then the front-panel pins against the manual
Starts for one second, then diesThe 8-pin CPU power cable is not connected, or a spare standoff is touching the boardConnect the top-left CPU cable. If it is in, check behind the board for a stray standoff
Turns on and off in a loopMemory training, or RAM the board does not like at full speedWait 15 minutes first. Then try one stick only, in slot A2
Windows starts, then crashesA driver or setting, not your assemblyFollow our blue screen fix guide

Two more tools that help. Most modern boards have four tiny lights labelled CPU, DRAM, VGA and BOOT; whichever one stays lit tells you which part to reseat or check, and the manual explains each light. And if you changed BIOS settings and the PC stopped starting, look for the CLEAR CMOS button or jumper (the manual shows it), which resets the settings to safe defaults without touching your parts.

The good news to hold onto: a brand-new build that will not show a picture is almost never a broken part. In our workshop it is a cable, a seat, or patience, nine times out of ten.

A new DDR5 build can sit on a black screen for up to fifteen minutes on its very first start. It is not broken. It is learning your memory sticks. Go and make a cup of tea, and do not press reset.

The mistakes we fix most often

Every one of these has been on our bench more than once. Read the list now and your build will probably skip all of them:

  • The plastic film left on the cooler. The PC overheats in minutes. Peel the base before mounting.
  • The monitor in the motherboard port. Black screen, perfectly healthy PC. The cable goes into the graphics card.
  • RAM in slots 1 and 2. The PC works but the memory runs at half speed. Use the slots the manual names, usually A2 and B2.
  • The forgotten CPU power cable. The 8-pin plug at the top-left of the board. Without it, nothing starts.
  • Mixed power supply cables. Cables from an old modular power supply can fit a new one and kill drives instantly. Only use the cables from the same box.
  • XMP never switched on. The RAM you paid for runs at its slow default speed forever. One BIOS setting fixes it.
  • Forcing the USB 3 front-panel plug. Its pins bend easily. Firm and straight, never at an angle.

Still choosing your parts?

Assembly is the easy afternoon. Choosing well is where a build is really won, and it is worth reading up before you spend. We keep a full set of plain-English guides: how all the components fit together, then the deep dives on processors, graphics cards, RAM, power supplies and SSDs. Every part below ships from UK stock with live prices:

Questions we get asked about building a PC

How much does it cost to build a PC?

In the UK in 2026: a basic home PC costs about £400 to £600 in parts, a solid 1080p gaming PC £600 to £800, a 1440p build £900 to £1,400, and a high-end 4K machine £1,600 or more. Building usually costs less than buying the same machine ready-made, and you choose the quality of every part.

How long does it take to build a PC?

Plan a relaxed afternoon. A first build takes two to four hours of assembly plus about an hour for Windows and drivers. Someone who builds regularly does the whole thing in under an hour. Rushing is what causes mistakes, so do not race it.

How hard is it to build a PC, really?

Easier than its reputation. Every connector is shaped so it only fits the right socket, there is no soldering, and one screwdriver covers the whole job. The genuinely tricky parts are the tiny front-panel cables and having the patience to check each step. If you can assemble flat-pack furniture, you can do this.

Can I build a PC with no experience?

Yes. Thousands of people build their first PC every week with nothing but a guide like this one, the motherboard manual and a free evening. If you get stuck, communities like Reddit’s r/buildapc answer beginner questions all day long, and no question there is considered too basic.

How do I ground myself when building a PC?

Touch something metal, such as the case frame or the power supply casing, before you handle parts and every few minutes while you work. Build on a table rather than a carpet, and keep parts in their grey anti-static bags until needed. That covers it. A £5 anti-static wrist strap is optional extra insurance, not a requirement.

Is it cheaper to build a PC or buy a prebuilt one?

Building is usually cheaper for the same performance, and the quality is more honest: prebuilt machines often save money on the parts you cannot see in a screenshot, like the power supply and the RAM speed. Prebuilt deals do exist though, especially in sales. Our gaming PC buying guide covers how to judge them.

How much do shops charge to build a PC for you?

UK shops typically charge somewhere between £50 and £150 for assembly and testing if you supply the parts. That buys convenience and a system-wide test, but you lose the experience, and most first-time builders tell us afterwards that the build was the fun part.

What order should I install the parts in?

CPU, M.2 SSD and RAM onto the motherboard first, outside the case. Then the cooler. Then the board goes into the case, followed by the power supply, the graphics card, and the front-panel cables last. This order keeps everything easy to reach and is the same one we use in the workshop.

Can I reuse parts from my old PC?

Storage drives and the case usually carry over fine. The power supply only if it is recent and from a good maker; an old or budget unit is not worth the risk next to new parts. RAM usually cannot move across generations (DDR4 does not fit DDR5 boards), and an old CPU will not fit a new socket.

Do I need to buy thermal paste separately?

Usually not. Almost every stock cooler and liquid cooler comes with paste already applied to the base, and boxed coolers often include a small tube as well. Check the base before mounting: if you see grey paste, you are ready. A spare tube costs about £5 and is handy to have, not essential.

How we know, and sourcesThis guide is based on the builds and repairs that come through the Hardvance workshop every week, plus the two resources we point every first-time builder at: Crucial’s explanation of DDR5 memory training (the source for the fifteen-minute first boot), and the community wiki at Reddit’s r/buildapc, where millions of first builds have been talked through. We sell PC parts, so we would love you to buy yours from us, but every step above works no matter where your parts came from.

Leave a Reply

Your email address will not be published. Required fields are marked *